Tuesday, February 23, 2016

Teaching Stay


Your dog can learn to stay in different positions.  Most dogs prefer to stay in the down position.  It is most comfortable for the dog to stay in for a length of time.  It also takes the most effort for the dog to move from a down position, as opposed to a sit or a stand stay.  If you expect to teach the stay in different positions, however, you may want to teach the sit stay before the down stay.  Dogs taught to down stay first, may often try to lie down while left on a sit stay because that is their habit already. 
Stay can be a difficult exercise for your b/d dog to learn.  All dogs like to be with us and don’t necessarily like to be left behind while we walk away.  But b/d dogs really like to keep track of us and they won’t be able to track us with their eyes as we leave to know where we are. 
Begin teaching stay by standing right next to your dog.  Don’t be in a hurry to walk away.  When you are practicing sit and down positions, reward while your dog is in position but don’t release her.  Instead, quickly reward again with her still in position.  By rewarding several times without a release cue, you are getting your dog used to staying in position longer.  After feeding several treats, then give the release cue.
Gradually pause slightly longer between treats, so your dog learns to wait in position longer for the treats.  When you are sure your dog will wait in position for the next reward to come, you can begin to add the stay cue.  If she is still trying to move out of position before the release cue, you need to practice this step more before moving on. 
Ask your dog to sit.  Reward in position.  Then give the stay cue and immediately reward your dog while she is still in the sit position.  Then release.  She just did her first very short sit stay!  The goal will be to very gradually build up the amount of time between the stay cue and the reward.  If your dog gets up after the stay cue but before the reward, begin again without rewarding.  The next time, make the time between the stay cue and the reward shorter so she can be successful. 
Build up to a 20 second stay with you staying right next to your dog.  Make sure you aren’t touching her during that time, because as you start to walk away from her, you won’t be able to touch her.  You don’t want her relying on touching you to stay in place.  Make your stay cue very clear, and make your release cue very clear.  Any rewards should come while your dog is still in the stay position.  If your dog lays down during the stay and you wanted her to sit, give the release cue and let her get up so you can start over again.  Do not reward, but make the next sit stay shorter so you can reward while she is still sitting.
When your dog can do a 20 second stay with you next to her, you can take one small step away from her after you give the stay cue.  Immediately step back next to her and reward.  Each time you practice, vary the direction you step away from her.  One time go out to the side, one time to the front, one time backwards.  When this is going well, take two steps away and immediately come back.  Then take two steps away and build up the time again to 20 seconds gradually.  It’s better to come back quickly and be able to reward a successful stay than to try to stretch the time too far and cause your dog to make a mistake.
Gradually add more distance and more time.  When you go farther, cut down the time at first and then build back up.  When you want to add more time, stay close by at first. 


Friday, February 19, 2016

Handling exercises


There are a couple places during the CGC when your dog will be expected to allow a stranger to touch her in different ways.  Here are a few articles that may help you with teaching those.  
Most dogs don’t automatically like being reached for. Dogs communicate through their use of personal
space. Some dogs want more space around them than others. When you reach into a dog’s personal
space, it may move away or seem stressed unless it has been taught otherwise. 

Sometimes this teaching happens without us needing to put forth any special effort. The dog learns
from consistent experience that people reaching for it always means good things are going to happen.
All too often, however, dogs learn to distinguish between pleasant reaching and not-so-pleasant
reaching based on the person’s voice tone and body language. Dogs are very good at learning which of
our signals lead to an experience that won’t be very nice for them. 

This doesn’t mean the dog has been hit or corrected in some way (although it can mean that). If your
particular dog doesn’t like to be brushed, and you reach for his collar and then brush him, he will quickly
learn that you reaching for him means he may be getting brushed and he will begin to avoid your reach.
Or he may learn to avoid your reach only in certain rooms or situations, or at a certain time of day– depending upon where and when you try to brush him. 

To read the rest of this article, click here ... 


Two other blog posts that may be helpful include: 

Grooming tips for blind/deaf dogs - click here ... 
Overcoming grooming fears - click here ...
Worried about strangers - click here ... 


Monday, February 15, 2016

Teaching Come


To teach your dog to come when called, you will need a signal that you can give her from a distance.  I use my breath to blow on Treasure.  She follows my breath back to me.  You may be able to use a long reacher or dowel rod with a padded end to touch her and lead her to you.  But the one that is most useful to me wherever we are is my breath.  It doesn't involve me carrying a long stick with me wherever I go. 
Begin very close to your dog and give your come signal.  Don’t expect her to come to you, as she doesn’t know what the cue means yet.  Just give the come signal and then immediately hand her a great treat.  Make it something really special to motivate her.  Do this often.  Give the cue to come and feed.  Don’t expect her to do anything at this point.  You just want her to associate the cue with great things.
When you can give the cue to come and she immediately startles and looks for you and the treat, you are ready to move on to the next step.  Now start to give the cue when you are next to her and be ready to reward your dog for even a slight turn in your direction.  Try it from both sides and even from directly behind her until she turns toward you whenever you give the cue.
Gradually, shape your dog’s response so she comes farther towards you.  Add distance gradually.  Try it in new areas but start close up to her and then build distance again slowly.  Always reward your dog when she comes to you.  Never call her to you for things that she won’t like – grooming, medication, confinement, corrections.  If you do, she may decide not to come to you because it won’t be rewarding for her. 

With a dog that cannot see or hear you, it is important to continue a tactile signal until your dog gets to you.  Your dog won't be able to see where you are, so continue to blow in her direction until she comes all the way to you.  Reward once she gets close enough to you for you to touch her easily.

Thursday, February 11, 2016

Teach walking on leash

There are times when our dogs must be kept on leash to ensure their safety, and this becomes
especially true when we have a dog that can’t see or hear. The leash becomes not only a means of
safety, but also a tool for communication. It’s important that we introduce the leash the right way, so it
becomes a useful tool for us and our dogs. We always want the leash to be a pleasant thing for our
dogs.

Begin by teaching your dog that touching her collar is a good thing. Touch her neck lightly and then
immediately feed her a treat. At first she may startle and turn to see who or what is touching her, but
with repeated exposure, she should start to look forward to the treat coming when she feels you touch
her neck. When she’s comfortable with this step, begin to focus on lightly taking hold of her collar
before you feed the treat. There’s no need to hold tightly. You don’t want to hold her in place, just curl
your fingers slightly around it and then feed a treat. She should begin to enjoy you taking hold of her
collar because it means something good is coming for her!
Continue reading this article here ...

Monday, February 8, 2016

Teaching Down


There are several ways to teach your dog to lie down.  Choose the one that works best with your dog.  Keep in mind that it will be most helpful to your dog if you reward while she is in the down position. 
Probably the easiest way to teach your dog to lie down is by using a food lure.  Begin with your dog in a sit position.  Lure your dog’s nose down toward the floor between her front legs.  Keep the food right by her nose but don’t let her eat it.  Move the food slowly so she follows it with her nose.  At first, just reward your dog for dipping her nose downward toward the floor.  After a repetition or two of this, you should find that your dog is following the lure downward more quickly and fluidly.  At this point, continue the lure downward to the floor and then continue to draw the treat slowly along the floor away from your dog. Watch for your dog’s front legs to step forward and her shoulders to drop down following her nose toward the floor.  At this point, reward.  Gradually lure your dog down closer to the ground.  The ultimate goal is that your dog will lie down completely onto her elbows before getting the reward. 
Sometimes your dog may need a little bit more help than just the lure.  Try to lure your dog’s nose under a low obstacle.  You can use a chair, coffee table, or even your own legs.  As your dog follows the treat under the obstacle, she will naturally lower her neck and shoulders and will often begin to crawl under the obstacle, ending in a down position. 
You can find other techniques for helping your dog to lie down in our book Through A Dark Silence if you are still having trouble. 

Once you are able to get your dog to go into a down position easily, you can begin to introduce a cue.  Give the cue right before you help your dog lie down.  Then reward while keeping your dog in the down position.  After she is finished eating, give your release cue and help her move out of position.  You can use the hand motion of the lure to the floor as a visual cue if your dog has enough vision to follow it. 
Repeat this sequence for a few sessions.  Then give the cue and pause just for a short moment to see if she starts to respond on her own without your help.  Be ready to step in and help quickly so the flow is not interrupted, and be sure to reward once she’s down.  Over time you will need to help her less and less, but continue to reward once she is down.  Don’t forget your release cue to let her know the exercise is finished.  


Friday, February 5, 2016

Teaching Sit

There are several ways to teach your dog to sit on cue.  I will talk about one of them here today.  You can refer to our book Through A Dark Silence to read about other techniques.  Choose the one that works best with your dog.  Keep in mind that it will be most helpful to your dog if you reward while she is still in the sit position. You may need to pet her while holding her in position and feeding at first until she gets the idea to stay sitting.


You may be able to lure your dog into a sit position. Hold the treat directly above your dog’s nose so she can reach up her nose easily to sniff it. The important part is to keep the treat very close to her nose without letting her get the treat. Slowly move the treat upward to stretch her nose up and back toward her shoulders. As her head stretches upward, her rear end should sink down towards the floor.


Immediately when her rear reaches the floor, pet and praise, and give a treat. If you can get the treat to her while she is still sitting, progress will be faster. Each time you lead her into a sit, it should get easier and easier as she learns that the behavior will lead to a treat.

This makes it sound very easy, but in reality, many variables can happen along the way. If your dog starts to sit but always pops back into a stand, you may need to reward just the beginning of the sit at first. As her rear starts to sink down just a little bit, pet and give the treat. Over time, you will begin to see her rear going lower and lower towards the floor. Reward these lower movements and stop rewarding the ones that aren’t so low. Eventually you will have a sit!


With active and wiggly dogs, it may be difficult to get her to stay in place as you try to lure her into the sit. You can help by positioning her with her rear towards a corner to help guide her to stand still, and put one hand gently under her chin or on her chest, while you lead her nose with the treat in the other hand.


When you can easily lure your dog into a sit position, begin to add the cue. Give the sit cue and then immediately help her with the lure to sit. Reward her while she’s in position, and then give a release cue to let her know that she can get up. With time, you can give the sit cue and then pause to see if your dog will begin to respond on her own without the lure. Be ready to help her if she is confused. But lure her less and less until she is responding on her own to the sit cue. Remember to reward in the sit position and then give the release cue so she knows she can get up.


If your dog has enough vision, the hand motion of luring her into a sit can be used as the sit cue. Just fade having food in your hand and the movement of your hand up over her head will become the signal for her to sit.

Now begin to practice the sit exercise in new places and with distractions going on - begin easy, by practicing in different rooms of the house, then the yard, then on walks, the park, etc. Be sure you practice around new people and dogs as well, all to prepare you and your dog for the CGC evaluation.

Wednesday, February 3, 2016

Getting a CGC with Your Blind/Deaf Dog


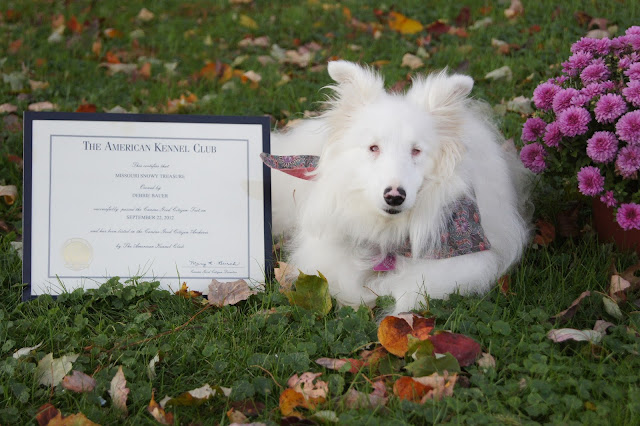
In this article, I will be referring to exercises required for the AKC (American Kennel Club) Canine Good Citizen evaluation. The rules and more information about this activity can be found by contacting the AKC or searching their website. This article is not meant to give you all the rules for the evaluation, but is meant as a guide to assist you with teaching your blind and deaf dog the exercises and when taking the evaluation. It’s a good idea to take a few minutes prior to the test to speak with the evaluator about any modifications that your particular dog needs to be successful. 

1. Accepting a friendly stranger. Your dog should remain by your side while a person approaches you, shakes your hand and spends a minute or two talking to you. Your dog can sniff the person, but should not be jumping on them, tangling them in the leash, or acting afraid. This one probably doesn’t require any special modifications to evaluate. You can easily practice this one when you are out for a walk, or when guests come to your home. As people stop to ask you about your dog, reinforce your dog for calm behavior. 
2. Sit politely for petting. I spoke with my evaluator ahead of time as to 

To read the rest of this article, click here ... 

Tuesday, February 2, 2016

New Project Posts! CGC with Blind/Deaf Dogs


I've had many requests for specifics about how to teach a blind and deaf dog various exercises, so we will begin with the Canine Good Citizen award from the AKC.  I will be posting about the various exercises required and then some tips on how to teach each one.  

Treasure and I would love for you to comment on our posts as you go along through the process, but most especially once you've earned your certificate!  It's a great accomplishment and can lead to other accomplishments (many therapy dog organizations use the CGC as part of their evaluations as well).  But most of all, it's a great way to have fun with your dog!